Thursday 23 May 2019

Three nucs under one roof


New queen
Three frame nucleus
New queen
Four frame nucleus

Once a beekeeper has “mastered” the basics ie what to look for during inspections, finding the queen recognising swarm preparations, etc etc, then planning and predicting what stage a colony will be at in a week or two become more important. This is particularly so if you have more than a couple of hives to manage or hives in an out Apiary. Having brood boxes, supers and frames on hand makes life much easier and saves time. Tasks can be completed in one trip to the Apiary rather than having to return with a couple of supers or extra frames. It can help to leave some extra equipment at each apiary, a brood box full of frames and a nucleus hive will often be found to be useful.

If you have some spare equipment on hand you are often able to make the most is what the bees, or good fortune, offers you:

I found queen cells in a colony (that had been!!) headed by a particularly gentle and productive queen, one cell was sealed and I was unable to find the queen so assumed that she had lead a swarm. I had planned to raise a few queens from her this year but, because I had some boxes on hand, I was able to take advantage right away. I was able to find four frames each with a good, open queen cell. I took down all other cells. I had available, an extra hive (floor, BB, crown board, and roof) a twin five frame nuc (floor, BBs, crown boards) but no extra roof.


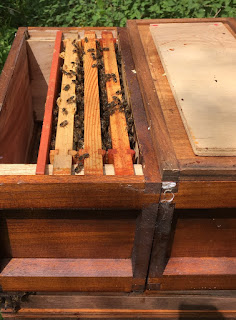
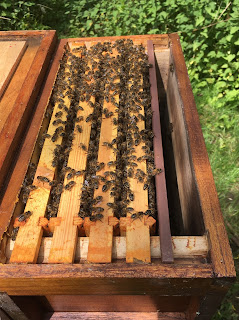
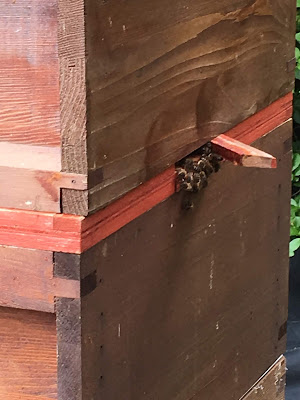
With a little head scratching I came up with this solution: Three hives in one. One colony was made up in the brood box and covered with the crown board. On top of this was placed the twin nucleus, arranged so that the entrances were to the left and right of the lower BB entrance. A forth colony was obviously left on the original site. I had lost a queen but been able to react quickly and by doing so I would soon have four new queens..........fingers crossed.

 I inspected these quickly last weekend, not really expecting to see any sign of a laying queen but there in the four frame nuc was a new queen looking very proud of the large patch of eggs that she had layed ;)

Tuesday 21 May 2019

Foundation-less Frames


Foundationless frames


Why would you want to use frames without foundation? Well there are a number of possible reasons:

 1. You save on the cost of buying foundation. We beekeepers are known for our frugality are we not?

 2. The bees can build the type of comb that they wish, worker or drone comb.

 3. If you insert the foundationless frames when the bees are trying to build drone comb, on a flow they will build a complete frame of drone comb. Knowing this can be useful in two ways:
 a) If you're queen rearing queens, you will want drones from your best colonies with which your new queens can mate with. By encouraging drone production in your best colonies you are directly effecting the quality of not just your new queens but those of your neighbours too, which will benefit you in return in subsequent years.
 b) By encouraging the colony to build a complete fame of drone comb it can then, once this is capped, be opened, inspected for varroa infestation loads and if high the whole comb can be removed and destroyed. Therefore removing a large portion of the varroa population. Cut out the comb using a knife or the edge of you hive tool and replace the frame, the bees will draw out more comb. This can be used in reverse to that above, colonies that are not particularly desirable can have drone removed so that their contribution to the gene pool is reduced, prior to their re queening.

 4. Swarm prevention! I have on a few occasions dissuaded a colony that had started queen cells from swarming for a while by placing foundation less frames in the brood area. The bees draw these frame very quickly, much faster than foundation, it does not introduce a barrier to the movement of the queen within the hive and the queen will lay in this new comb almost as it is drawn, immediately  providing more space within the brood nest.

Why wouldn't you want to use founationless frames?

1. Well for a start, your hives must be level! The bees draw out the comb hanging from the top bar, it will always be vertical because that's what gravity does. If your other frames are on the tilt, because your hive is, it will cause problems.
2. Too much drone comb will according to some promote varroa population growth.

How do you prepare foundation less frames?

I initially used thin (1mm) balsa wood, bought from craft suppliers, these came in 4 inch by 2ft sheets that needed to be cut to widths of about 1 to 1.5 mm which is time consuming, these strips of balsa would then be fixed with glue and pinned through from the foundation retaining strip where the foundation would usually go.

I now use tongue depressors, as used by dentists these are readily available on line at Amazon and similar web sites.

Lolly pop sticks

These are simply glued into the slot on the top bar with a thin bead of PVA glue.    

Foundationless frames


Beehive framesBeehive frames

This takes no time at all to do.

There is no need for pins, the bees propalise all spaces fixing everything in place.


The bees will festoon from the top bars and build comb quickly. Initially the comb will look something like this:
Natural bee comb

Later, as the frame is filled the bees will respect bee space leaving a gap between the comb and the side and bottom bars.

Pesticide free wax


At this point it is important to always keep the comb vertical. It is not supported from either the side or bottom bars and may hold brood and nectar that has considerable weight. If the comb is held horizontally it will bend and probably break off! 

For inspections the frame should be held by the frame lugs and rotated 90 degrees so that the top bar is now vertical. Rotate the frame about the top bar away from you. Next rotate the frame 90 degrees in the opposite direction to your initial manoeuvre. You will now be looking at the reverse face of the comb, the top bar now being the lower edge of the frame. During this procedure the comb has not moved from the vertical axis. Try it a few times with an empty frame, its really rather easier in practice than it sounds.

Pinching some comb between your fingers and stretching a small portion towards the frame edges breaks bee space and encourages the bees to fix the comb to the frame.

I use British Standard frames and this method works well with these. If however you use 14x12 or other larger format frames then extra support will be required due to the extra area and hence weight of the comb. This is usually given by fixing two lengths of steel wire or fishing line between the side bars. This becomes incorporated into the comb adding strength.

I have used this method on super frames and found them to be just as robust when the honey has been extracted.

This is what you will end up with, natural, pure bees wax comb that queens just love to lay into.

Find the queen


By the way, can you see the queen on this frame? She is there.

So why not give it a go? Positively influence your local gene pool by breeding drone from your best stock or keep your varroa levels in check without using chemicals!

Foundationless drone comb frames
Drone Comb


Saturday 11 May 2019

Snelgrove Board


Queen rearing using a Snelgrove board
Cell raiser above a Snelgrove board

There is a comprehensive account on the many uses of a Snelgrove board on The Welsh Bee Keepers association web site, here:  WBKA  They explain the methods of using the board for swarm control and rearing of a new queen plus a few innovative uses too. Here’s my take on using the board to rear a batch of queen cells:

I came across a colony making swarm preparations early this season.  They had sealed queen cells, as the weather was fine, according to the books they should have already swarmed but the queen was still present. I was looking to prepare some cell builders in the next few days and as a colony preparing to swarm is obviously geared up to build queen cells, here was an ideal opportunity to use this colony as a cell raiser and prevent the loss of a swarm. I decided to to use the Snelgrove board to prepare them for taking grafts.

The hive was taken off it's floor and a clean brood box containing 10 frames of foundation put in it's place. The queen on a frame of sealed, emerging brood was placed in the centre of this box, the frame having been checked to ensure that there were no queen cells present. A queen excluder was then placed on this brood box followed by the super (actually another brood box, used as a super to get brood frames drawn out for use in nucleus colonies later in the season). The Snelgrove board covers the supers with all doors shut except one at the side of the hive giving access to the top level.
The brood chamber, two brood boxes as this was on double brood, was checked frame by frame and all queen cells removed. The two boxes then completed the stack.

Snelgrove board
Bees at the top entrance

On the 8th day after inserting the board I removed all the emergency queen cells that the bees had built. This resulted in a large queen-less colony (two brood boxes above the Snelgrove board) that had lots of emerging young nurse bees, a large foraging force, no larvae to feed and no way for the bees to make a new queen until I gave them some grafted 12-hour old larvae.

By using the Snelgrove board you are separating the queen and flying bees away from the brood as in a standard artificial swarm. When used  for swarm control according to the methods described, on day 5 the entrances are switched, diverting recently promoted flying bees from the top queen-less half to the lower queen-rite part of the colony. I was intending to raise a larger number of queen cells. I therefore wanted the top boxes to remain strong in numbers of bees and so did not carry out this step.

I grafted from one of my breeder queens late on the ninth day, inserting eight cell cups next to a pollen frame in the centre of the top brood box.

These grafts would have no competition from any other open brood.

Two days after inserting the grafts I checked the grafts for acceptance, the cells are well on their way, being tended by many nurse bees.
Five days later all the queen cells are capped, and I diverted some of the foraging force to the lower colony. This would now boost the strength of the lower colony.

The result:


Grafted queen cells
Ripe queen cells
Seven out of eight grafts, almost 90%, that's probably my best rate of takes so far.
Now just the small matter of getting these new queens mated.