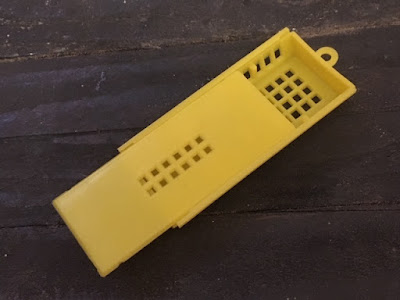
Thursday, 24 October 2019

Late Season Grafting


I have always completed any queen rearing by the end of July when there are plenty of drones. However this year a few grafting rounds failed to either produce enough sealed queen cells (the bees would start them only to take them down, ever so frustrating!) or the queens failed to get mated. This has been a bad year for getting queens mated, I have had more drone layers this year than at any other. No idea why!

By now the weather had turned colder, the flow had all but finished but I decided to have one last round of grafting.

I had chosen another colony to use as as a cell raiser. It was very strong, on double brood and had three supers full of bees. I had prepared the cell builder in the usual way, ensuring that the hive was packed with bees, many of which were nurse bees.

Grafts were introduced to the desperately queen-less cell raiser. Checked a couple of days later there appeared to be eight takes from the ten offered. Not bad.


8/10 takes?


The queen cell were introduced to nucs as normal, There were actually seven ripe queen cells seven nucs in total and so seven potential new queens.

I checked for emergence a few days later and found these emerged queen cells:

Empty queen cells

I posted this picture on Facebook on 23rd August and had a number of comments and pms saying that they (queens) wouldn't get mated as all the drones had been kicked out and it was too cold.

It was true most colonies had got rid of their drones but I had a few colonies that were queen-less due to late failed supecedures and some failed mating nucs, these had a few drones still active. I recall reading somewhere that this is a good way to carry out selective breeding, remove queens and feed selected drone colonies at this time of year and these drones will dominated the local population. I did however think that maybe this exercise  was doomed to failure!

Well did it work?

Yes it did! Six out of seven nucs have mated queens that were laying well and adding to their colony numbers. I had deliberately made up strong nucleus colonies to defend against wasps, they all received frames of stores and were fed too.
I have already given one colony away to a beekeeper friend that had lost a queen, the others are looking good going into winter.

I'll do this again next year, putting more effort into stimulating drone production in some colonies that have desirable characteristics.


Friday, 11 October 2019

Nucleus Colony Give Away: A free prize draw


This draw is now closed and we have a winner!


The winner is... Chris from Frome
Congratulations to Chris


I am planning to run a similar event in the run up to Easter 2020, this will be open for just a week or two prior to the Easter weekend, so subscribe to this site for details
(desk top view is easier! or click Here)


I am offering the chance of a free five frame nucleus colony headed by one of my Local/AMM 2020 queens.

The winner will be selected at random on 20th December 2019.

You should be a beekeeper or have recently completed a beginners course and if you are the winner you should be able to collect the nucleus from Crewe, Cheshire in the UK. (I don't post or ship nucleus colonies).

The colony will be ready for collection by the winner in July, or earlier if weather conditions are favourable.

To enter the draw, simply complete the form: This draw is now closed
Good Luck!

Monday, 16 September 2019

A WARNING!!! Varrox Vaporiser


Varrox vaporiser
Hive sealed during treatment
It’s time to treat for varroa after taking off the honey harvest.

I have used oxalic acid based products with a Varrox Vaporiser for five years and must have done hundreds of treatments. One day last week I’d completed about a half dozen hives and decided to take a break after disconnecting the battery. This nucleus colony housed a newly mated queen, I’d just seen her for the first time and there were lots of sealed worker brood cells, happy days!

When I came back I found smoke bellowing from the nuc, I hadn’t disconnected the battery after all!
Luckily there were no actual flames but after letting things cool down for a while and taking a peak inside, there were lots of apparently dead bees on the floor and frames.

Having written off this colony, I was pleasantly surprised five days later to find three frames with eggs and lots of bees. The queen was obviously still present and laying. I didn’t see the queen but who could blame her for hiding from me after our previous encounter?

Were the bees dead or were they overcome with CO2 ? Who knows? I’m just grateful that they survived and I learned a lesson, another one!

Take care when using a vaporiser, in addition to the toxic nature of these products there is a substantial fire risk!


Tuesday, 23 July 2019

Are Native Bees Productive?


Native Black bees
AMM colony split down at the start of the season

I purchased a couple of Irish AMM queens last year to use as breeder queens. They both came trough the winter well in double six frame nucs and then expanded into double BBs. When it came time to super up I decided to break one of them down into nucs, I only wanted to graft from these queens after all. This queen I put into a nuc with two frames, the rest foundation, took it home and left to build up. The other I supered  up as normal.

The result:

The colony that was kept together currently has four supers on.

The broken down colony quickly expanded into two BBs, I then put a BB on as a super and I have just had to put another super on as they have almost filled the other with honey.

One of the early daughter queens (from last year) has two BB supers and three supers.

Who said that AMMs aren’t productive? I’m really rather pleased with them.

Wednesday, 3 July 2019

Selecting Breeder Queens, yellow or dark?

I am primarily trying to breed dark, near native bees and have managed to make reasonable progress although most colonies have some workers with yellow banded abdomens. Considering I'm based in Cheshire which has a large number of beekeepers, many of which purchase Buckfast bees, this isn't a great surprise.

Native honeybees
Dark, local bees, these were sold to a gent that I was mentoring a few seasons ago. They were very docile and produced a honey surplus in their first year.

I have over the last five years bred as many queens as I was able to with the equipment I had available, trying different methods of queen rearing, selecting desirable stock and culling the least desirable.

A Buckfast swarm caught just a mile from my apiary

However, I have a yellow queen (she's marked yellow too, 2017) that has provided me with brood frames and bees to make up a large number of nucs, bees for Apideas and produced a honey crop each year that has surpassed all of my other colonies. In addition the colony is very calm on the comb, the bees just don't seem to realize that they are being scrutinized. As far as I recall I have had no stings from this colony either BUT they are (the workers) 40% yellow. Last year and this I had ear marked her as "break up into nucs" but she (the queen) just keeps on giving, what to do ......

Nucs for sale
Nucleus colonies ready to go

This spring, feeling that I should repay the dept, I deciding to graft from this very productive and un-swarmy queen. I didn't want to use up a lot of resources so I chose to use the remains of a strong colony on double BB from which I had taken a nuc from to donate to my association apiary as a cell raiser. I put in seven grafts, four of which took and subsequently went on to produce laying queens. The last of these went on to their new owners today, these last two were on four frames last Friday in a "Twinstock type" nuc double from cornishhoney.co.uk. When I transferred them into their sales nucs on Sunday they had built the fifth frame out and the queens had laid in them. They were all as calm on the frame as their mother's colony, hopefully they will continue to be so as they expand and grow with their new keepers.

A twist in the tail:
This colony, having been a dream to work with is currently on a double BB with five supers, finally decided to let me down: I inspected them this Sunday, There were a couple of sealed swarm cells and more unsealed, luckily my yellow queen had been clipped and was still resident. She was easily transferred to a nucleus along with another emerging brood frame plus bees (WITH NO QUEEN CELLS: this is important!!) and a frame of stores. She will hopefully come back into lay and build up up the strength of the new colony.

So what to do now? We are told to "go with the bees". So my plan is to use the now queen less colony as a cell raiser in two cycles, one to raise more queens from one of my Irish queens, transferring them to cell finishers and then raising more queens from this industrious yellow queen.

The original colony obviously have their minds set on raising queen cells, so I will set them up and let them do their thing: Rear queens! I'll overwinter the resulting queens as nucs, using them in the spring to replace winter losses, nuc building or, if the winter is kind, sell any surplus in the spring.

I'll post some more pics here as we go through this process.


Thursday, 23 May 2019

Three nucs under one roof


New queen
Three frame nucleus
New queen
Four frame nucleus

Once a beekeeper has “mastered” the basics ie what to look for during inspections, finding the queen recognising swarm preparations, etc etc, then planning and predicting what stage a colony will be at in a week or two become more important. This is particularly so if you have more than a couple of hives to manage or hives in an out Apiary. Having brood boxes, supers and frames on hand makes life much easier and saves time. Tasks can be completed in one trip to the Apiary rather than having to return with a couple of supers or extra frames. It can help to leave some extra equipment at each apiary, a brood box full of frames and a nucleus hive will often be found to be useful.

If you have some spare equipment on hand you are often able to make the most is what the bees, or good fortune, offers you:

I found queen cells in a colony (that had been!!) headed by a particularly gentle and productive queen, one cell was sealed and I was unable to find the queen so assumed that she had lead a swarm. I had planned to raise a few queens from her this year but, because I had some boxes on hand, I was able to take advantage right away. I was able to find four frames each with a good, open queen cell. I took down all other cells. I had available, an extra hive (floor, BB, crown board, and roof) a twin five frame nuc (floor, BBs, crown boards) but no extra roof.


With a little head scratching I came up with this solution: Three hives in one. One colony was made up in the brood box and covered with the crown board. On top of this was placed the twin nucleus, arranged so that the entrances were to the left and right of the lower BB entrance. A forth colony was obviously left on the original site. I had lost a queen but been able to react quickly and by doing so I would soon have four new queens..........fingers crossed.

 I inspected these quickly last weekend, not really expecting to see any sign of a laying queen but there in the four frame nuc was a new queen looking very proud of the large patch of eggs that she had layed ;)

Tuesday, 21 May 2019

Foundation-less Frames


Foundationless frames


Why would you want to use frames without foundation? Well there are a number of possible reasons:

 1. You save on the cost of buying foundation. We beekeepers are known for our frugality are we not?

 2. The bees can build the type of comb that they wish, worker or drone comb.

 3. If you insert the foundationless frames when the bees are trying to build drone comb, on a flow they will build a complete frame of drone comb. Knowing this can be useful in two ways:
 a) If you're queen rearing queens, you will want drones from your best colonies with which your new queens can mate with. By encouraging drone production in your best colonies you are directly effecting the quality of not just your new queens but those of your neighbours too, which will benefit you in return in subsequent years.
 b) By encouraging the colony to build a complete fame of drone comb it can then, once this is capped, be opened, inspected for varroa infestation loads and if high the whole comb can be removed and destroyed. Therefore removing a large portion of the varroa population. Cut out the comb using a knife or the edge of you hive tool and replace the frame, the bees will draw out more comb. This can be used in reverse to that above, colonies that are not particularly desirable can have drone removed so that their contribution to the gene pool is reduced, prior to their re queening.

 4. Swarm prevention! I have on a few occasions dissuaded a colony that had started queen cells from swarming for a while by placing foundation less frames in the brood area. The bees draw these frame very quickly, much faster than foundation, it does not introduce a barrier to the movement of the queen within the hive and the queen will lay in this new comb almost as it is drawn, immediately  providing more space within the brood nest.

Why wouldn't you want to use founationless frames?

1. Well for a start, your hives must be level! The bees draw out the comb hanging from the top bar, it will always be vertical because that's what gravity does. If your other frames are on the tilt, because your hive is, it will cause problems.
2. Too much drone comb will according to some promote varroa population growth.

How do you prepare foundation less frames?

I initially used thin (1mm) balsa wood, bought from craft suppliers, these came in 4 inch by 2ft sheets that needed to be cut to widths of about 1 to 1.5 mm which is time consuming, these strips of balsa would then be fixed with glue and pinned through from the foundation retaining strip where the foundation would usually go.

I now use tongue depressors, as used by dentists these are readily available on line at Amazon and similar web sites.

Lolly pop sticks

These are simply glued into the slot on the top bar with a thin bead of PVA glue.    

Foundationless frames


Beehive framesBeehive frames

This takes no time at all to do.

There is no need for pins, the bees propalise all spaces fixing everything in place.


The bees will festoon from the top bars and build comb quickly. Initially the comb will look something like this:
Natural bee comb

Later, as the frame is filled the bees will respect bee space leaving a gap between the comb and the side and bottom bars.

Pesticide free wax


At this point it is important to always keep the comb vertical. It is not supported from either the side or bottom bars and may hold brood and nectar that has considerable weight. If the comb is held horizontally it will bend and probably break off! 

For inspections the frame should be held by the frame lugs and rotated 90 degrees so that the top bar is now vertical. Rotate the frame about the top bar away from you. Next rotate the frame 90 degrees in the opposite direction to your initial manoeuvre. You will now be looking at the reverse face of the comb, the top bar now being the lower edge of the frame. During this procedure the comb has not moved from the vertical axis. Try it a few times with an empty frame, its really rather easier in practice than it sounds.

Pinching some comb between your fingers and stretching a small portion towards the frame edges breaks bee space and encourages the bees to fix the comb to the frame.

I use British Standard frames and this method works well with these. If however you use 14x12 or other larger format frames then extra support will be required due to the extra area and hence weight of the comb. This is usually given by fixing two lengths of steel wire or fishing line between the side bars. This becomes incorporated into the comb adding strength.

I have used this method on super frames and found them to be just as robust when the honey has been extracted.

This is what you will end up with, natural, pure bees wax comb that queens just love to lay into.

Find the queen


By the way, can you see the queen on this frame? She is there.

So why not give it a go? Positively influence your local gene pool by breeding drone from your best stock or keep your varroa levels in check without using chemicals!

Foundationless drone comb frames
Drone Comb


Saturday, 11 May 2019

Snelgrove Board


Queen rearing using a Snelgrove board
Cell raiser above a Snelgrove board

There is a comprehensive account on the many uses of a Snelgrove board on The Welsh Bee Keepers association web site, here:  WBKA  They explain the methods of using the board for swarm control and rearing of a new queen plus a few innovative uses too. Here’s my take on using the board to rear a batch of queen cells:

I came across a colony making swarm preparations early this season.  They had sealed queen cells, as the weather was fine, according to the books they should have already swarmed but the queen was still present. I was looking to prepare some cell builders in the next few days and as a colony preparing to swarm is obviously geared up to build queen cells, here was an ideal opportunity to use this colony as a cell raiser and prevent the loss of a swarm. I decided to to use the Snelgrove board to prepare them for taking grafts.

The hive was taken off it's floor and a clean brood box containing 10 frames of foundation put in it's place. The queen on a frame of sealed, emerging brood was placed in the centre of this box, the frame having been checked to ensure that there were no queen cells present. A queen excluder was then placed on this brood box followed by the super (actually another brood box, used as a super to get brood frames drawn out for use in nucleus colonies later in the season). The Snelgrove board covers the supers with all doors shut except one at the side of the hive giving access to the top level.
The brood chamber, two brood boxes as this was on double brood, was checked frame by frame and all queen cells removed. The two boxes then completed the stack.

Snelgrove board
Bees at the top entrance

On the 8th day after inserting the board I removed all the emergency queen cells that the bees had built. This resulted in a large queen-less colony (two brood boxes above the Snelgrove board) that had lots of emerging young nurse bees, a large foraging force, no larvae to feed and no way for the bees to make a new queen until I gave them some grafted 12-hour old larvae.

By using the Snelgrove board you are separating the queen and flying bees away from the brood as in a standard artificial swarm. When used  for swarm control according to the methods described, on day 5 the entrances are switched, diverting recently promoted flying bees from the top queen-less half to the lower queen-rite part of the colony. I was intending to raise a larger number of queen cells. I therefore wanted the top boxes to remain strong in numbers of bees and so did not carry out this step.

I grafted from one of my breeder queens late on the ninth day, inserting eight cell cups next to a pollen frame in the centre of the top brood box.

These grafts would have no competition from any other open brood.

Two days after inserting the grafts I checked the grafts for acceptance, the cells are well on their way, being tended by many nurse bees.
Five days later all the queen cells are capped, and I diverted some of the foraging force to the lower colony. This would now boost the strength of the lower colony.

The result:


Grafted queen cells
Ripe queen cells
Seven out of eight grafts, almost 90%, that's probably my best rate of takes so far.
Now just the small matter of getting these new queens mated.


Tuesday, 23 April 2019

Honeybee Genetics

Honeybee genetics explained

Genetics take some getting your head around. The processes of meiosis and mitosis are not easily understood, for me at least. I'll try to explain how honey bee genetics works in a simple way and to explain how understanding it can help in our bee breeding.

Chromosomes are the structures that contain the genes of an organism. Bees have about 15,000 genes. Most animals normally have two sets of chromosomes. One set comes from the mother and one from the father. They are called diploid. Di means two, and ploid stands for chromosome.

Queens and worker bees have 32 chromosomes, 16 from the mother (via the egg) and 16 from the sperm with which the egg is fertilised. Drones are produced from unfertilised eggs. They do not receive a sperm cell when their egg is laid. This means that they only have half the number of chromosomes (16 rather than 32). They are then said to be haploid, from the Greek haploos, single.

Each egg laid by the queen will be unique due to chromosomal cross over during meiosis. Simply put, the genes are mixed. The potential number of possible combinations is huge. Every daughter (worker or daughter queen) will be genetically different from her sisters. Each egg receives half of the queen's 32 chromosomes, she can therefore only pass on half of her genes to her (daughter) offspring. 

Drones, as we have said, are produced from unfertilised eggs, their genetic make up is 100% from their mother. Each drone will still be unique, due to the chromosomal crossover over of their mother's genes. All sperm cells produced by an individual drone will be identical, genetic clones. The drone only has 16 chromosomes, each sperm cell must carry 16 chromosomes, so each sperm cell has 100% of this genetic material.

When selecting colonies to breed from we generally breed from our best queen, which makes sense! However when selecting colonies to rear drones from we must remember that drones develope from unfertilised eggs. Their genes come from the mating of their grandmother, not their mother! Not easy the get your head around but it does make sense if you've understood the above. It is therefore essential to keep accurate records for queen and drone rearing.

We can use this knowledge to selectively breed our honey bees. A colony (or colonies) with desirable traits can be used to rear a large number of daughter queens. The sperm cells from the drones produced by this new generation of queens will carry only genes from the original (desirable) queen. For example, if we aquire say a 100% AMM queen (we are interested in native bees after all), raise lots of daughter queens from her and encourage them to raise drones (here), we can use these colonies in isolated mating apiaries or select only drones from these to carry out artificial insemination to give us 50% AMM - 50% hybrid bees. By repeating the process, taking larvae from the 50% pure AMM colonies and mating with the drones from the daughter queens (100% AMM drones) the next generation will now be 75% AMM. For the following generation 87.5%, the next 93.75, then 96.9%, 98,4%, 99.2% and so on. Starting with bees that are part AMM will mean we start off at a higher percentage.

This technique of line or inbreeding can be used to fix a number of desirable traits not just race. We have to be aware though that there are consequences of using this technique as well as advantages.

F1 generation AMM queen

This queen is a daughter of an Irish AMM queen.  She was raised in  2019. She was open mated away from my main apiary so her worker daughters are a mix of yellow and dark but she will produce 100% AMM drones for the main mating apiary.

The sting in the tail
There is another aspect of honeybee genetics that we should be aware of, sex determination. Whether an individual is male or female is different in honey bees than in mammals. We have seen above that males are produced when the queen lays an unfertilised egg, there is a little more to it though.

There is a gene that determines the sex of bees. There are different alleles, or versions, of this gene. If the allele from the mother (egg) is different to that from the father (sperm) the bee will be female. If they are the same the bee will be male.

Normal Drones. An unfertilised egg will, having only one sex allele, develope as a normal male/drone. There is only one allele and so cannot be different.

Diploid drones. Males can develope from fertilised eggs if the egg and the sperm both have the same sex allele. These drones will not be viable, they contian 32 chromosomes and will not function as a normal male. Worker bees will remove these diploid drones when the egg hatches. The holes left in the brood area result in a pepper pot brood pattern. The worst effects are seen in inbreeding. A brother sister mating will yield only 50% viable brood.

The chances of the two sex alleles being the same are normally low, there are twenty plus versions of the allele at least (I think I have read somewhere that there are over fifty?). By inbreeding the odds of the two alleles being the same become much higher. If we continue to breed from the same closely related group of bees, as in the above example, we will have weak colonies that are suseptable to disease and pests.

We could start with a large population and manage different breeding lines, raising drones from one line each year and alternating in subsequent years. Working in groups with other beekeepers helps here, a larger breeding population will better mainatian genetic diversity.

Also from time to time we can introduce new genetic material by bringing in new queens.

I hope that was a reasonably clear explanation of honeybee genetics and how we can use to select the colonies that we should breed from.



Sunday, 17 March 2019

How to transfer bees from a nucleus hive


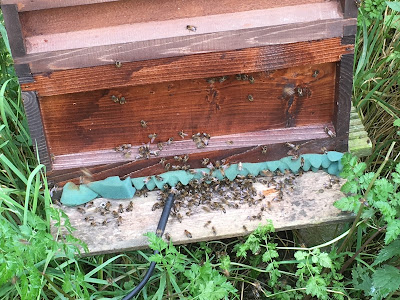
So you have just obtained your first colony of bees, exciting! What do you do now? Here's a basic list of the steps you need to carry out to get your bees settled into their new home.

Nucleus of bees, six frame nuc
You hopefully have completed a beginner's course, these are run by most local BBKA branches. They also hopefully provided you with access to a mentor, someone that will be able to give you advice, answer questions and provide practical help when required. They could have invited you to help them with inspections of their own bees. You might even be able to purchase your first colony from them That's how I acquired my first colony, I "helped" my mentor to graft larva to raise a batch of new queens and bought the colony that built up to strength first.

Your hive should have been built and treated/painted prior to obtaining your bees, spring nucs can develop very quickly and, if they run out of room, they will swarm! They should therefore not be left in the nuc box for very long. You will also need a dummy board, frames with foundation and a feeder and of course a hive stand of some sort in position.


  1. Collect your nuc in the evening, when the bees have stopped flying or in the early morning before they start to fly. Make sure that bees can not escape during the journey, use a hive strap or ratchet strap to secure the integrity of the hive/nucleus.
  2. When transporting bees, they should be positioned so that the frames are in line with the direction of travel, in this orientation sudden braking will not cause frames to push together, crushing and killing bees, potentially the queen!
  3. Place the nuc in position on the hive stand, the entrance should face the direction that your new hive will. 
  4. Open the entrance. If your nuc has a disc type entrance, open it fully, do not put it to the queen excluder, the bees in a populous colony will over-heat in warm weather. This a horrible sight to see!
  5. Leave the bees to fly and to settle down for a day or two. (This and step 6 are ideal and optional, I have transferred nucs in the rain immediately after relocation with no adverse effects on numerous occasions)  
  6. Choose a warm sunny day when the bees are flying well, 
  7. Move nuc hive to one side and place your new hive on the stand, with the entrance block in place to reduce the entrance. 
  8. Place the dummy board and one frame of foundation in brood box at back. 
  9. Open nuc hive and gently smoke your bees, if required, good bees should need minimal smoke, especially when the colony is small. 
  10. Lift out the first frame of bees and place in hive, next to the first frame of foundation. Transfer the other frames of bees, making sure that they are the same way round and the same order as in the nuc hive. 
  11. Add one frame of foundation at front. Push all frames towards the front of the brood box. 
  12. Shake any bees still in the nuc hive into the new hive. If you place the nuc box on it's side a meter or so infront of the new hive, any stray bees left on the nuc will find their way home.
  13. Fit crown board and empty super (this will be used to house the feeder). 
  14. Fit the hive roof. 
  15. Later, the same evening, give the bees a feeder full of syrup, 1kg sugar mixed with 1 litre of water. Place the feeder above the crown board, the super provides the height required to accommodate the feeder. 
Leave the bees to settle for a week or so, on inspection, ensure that the bees have enough room, add frames of foundation next to brood frames, front and back, as the previous ones are drawn out. Continue to feed as required until the brood box is full with drawn out comb. Do not split the brood by placing foundation between frames containing brood and or eggs!

Note: You will need either a second hive or an empty nucleus hive. At some point your bees will prepare to swarm and you should be prepared too! Get your equipment ready now and have a plan.

Good luck with your bees!


Friday, 8 February 2019

Honey bee bait hive

I tried to attract a swarm before I actually had any bees of my own by using lemon grass oil but failed miserably. I didn't have the materials required to attract a swarm. Ideally a bait hive will be an old bee box in which bees have lived previously, it will therefore have propolis and bees wax impregnated into the wood and some old comb.

Results can be improved by using a pheromone attractant, these are available commercially but if you keep bees already they can be prepared yourself: Any one that has a number of hives will have the the  opportunity to evaluate the colonies and differentiate between their traits, if there are colonies that display undesirable traits, be it temper, chalk brood or just not building up as desired, or whatever, has the option to re-queen using eggs or larvae from their other colonies. This requires the removal of the old queen. These can be discarded, or more favourably, they can be used to progress your beekeeping. After dispatching the unwanted, queen she should be deposited in a bottle of alcohol or similar solvent and any other such queens should be added along with any unwanted virgin queens. The resultant tincture is the daubed onto the wood work of the bait hive. This is an excellent swarm attractant!

Swarm attractant, bee swarm lure
Queens in alcohol


A farming family attended our branch meeting a couple of years ago, looking to have some bees on their farm. I contacted them and arranged to meet and discuss placing a number of hives there. They showed me around their farm, which was very interesting, they have robots that milk their cows on demand. If you ever get the chance to visit a similar dairy farm you should jump at the opportunity it's fascinating. We eventually chose a suitable site, surrounded on three sides by a small wood, the open side being south facing. Shortly after I placed a couple of nucs there and left them to overwinter. On my second visit I noticed that there was a wild tree colony not thirty feet from my nucs. I had chosen a site that bees had decided was an ideal site too!

Feral honey bees, wild bees, tree bees
Wild tree bees
They were housed in a beech tree that had two trunks that had fused together and, presumably formed a cavity within. The overall girth the the tree isn't very wide so I concluded that the cavity isn't large and the bees would, next year, swarm at the earliest opportunity. I therefore decided to place a bait hive to catch any resultant swarm. I used two old brood combs, two foundation frames and a couple of drawn super frames, the remaining space being filled with foundation less frames along with some of my home made swarm attractant in a BS brood box. The  books say to place a bait hive over one hundred and fifty meters or more from their home hive but I didn't have that luxury, mine was placed just twenty meters away from the tree.  As we all know the bees don't read books so I was cautiously optimistic!

I called at the farm to inspect the nucs that I had placed there earlier last May, the farmer came out to greet me and said that the pest controller had called to deal with a mole infestation two days after my last visit and had pointed out a large swarm of bees flying over the wood where my bees were located. I was certain that any swarm was not from my nucs, they had plenty of room to grow and had newly matted queens heading them, it must be a swarm from the tree. Could they have taken the bait and moved into my hive?

Well, yes they did! There was a lot activity at the hive entrance, with bees coming and going and bringing in lots of pollen, this was a prime swarm headed by a mated queen. On inspection they had drawn out all eleven frames, there were four frames of brood and the rest was very light honey and nectar. I made a note to bring another brood box the following day to give them room to grow. I didn't take any honey from this colony but I will take some from this apiary in May this year if I can, the honey is much lighter in colour than from my existing apiaries. Instead I decided to propagate from these bees, the were very dark in colour but their abdomen banding is grey, indicating that they are Carniolan bees, not what I really want, as I am trying to breed Apis mellifera mellifera. They are however very good bees to work with, being very calm on the comb and as far as I can, tell produce a good honey crop. I will keep them separate from my queen breeding.

I used a Snelgrove board to rear queens from this swarm colony, this is the first time that I have used a Snelgrove board. I now have four daughter colonies from the swarm, two in five frame nucs and two in double five frame nucs. This is despite a ferocious attack from wasps at the end of last season, robbing out nucleus colonies. I shall write a page documenting using the Snelgrove board later this year. I found it easy to use and had very good results, they are easy to make from a crown board although I got mine from an association auction.

The Safest Way To Introduce A Queen

I don't usually have to introduce a queen to a colony of bees: By raising queens, most of my queens emerge into a queen less nucleus hive, made up specifically to enable the queen to be mated. I have though on occasion acquired a mated queen for the purposes of introducing desired genetic material to my breeding programme. These queens therefore are very valuable to me and I therefore want to minimise the likelihood of them being rejected by their new colony.

The first time that I attempted such an introduction was with an AMM queen that I had acquired in-order to evaluate and hoped that she would push forward my progress to breed British Native bees. I made up a nucleus colony of two frames of bees plus stores and introduced the queen in a queen introduction cage. I plugged the exit with candy to delay the release of the queen as is suggested and suspended the cage between the two brood frames. On inspection two days later the cage was empty, the queen having been released, happy days!

Plastic queen cage
Queen cage

However, the following day I found a very sick looking queen on the ground below the entrance to the hive, she was easy to spot as she was marked. The only thing that I could think of to do was to place her back into the cage, with another plug of candy and try again. I checked for any queen cells and found none. Fingers crossed, this time she would be accepted.

No such luck I found her outside the hive three days later, this time she was dead.

If I was going to invest in new queens I needed to find a more reliable way to introduce them into a colony. I searched the web and found a number of pages referring to "push in cages", beekeeping suppliers such as Thornes stock these items (Link) but they are easy to make yourself and they will probably be better ......

They can be made from woven steel mesh (size: 8 mesh). , I found that this supplier (Link) offered "samples" in a size (Large Sample 300mm x 200mm, A4 sized) that enables two good sized cages to be made from one A4 sheet. These are stainless steel and therefore should last a lifetime or more if they are looked after. After use I place mine into the dish washer for a couple of cycles and they come out as new. Galvanised steel mesh would be cheaper though.

Using sharp wire cutters, divide the sheet into two. Then, on each long side make a cut 2cm deep, 2 cm from each end, (2cm is 7 wires). The two cm "edges" can then be folded over to produce a the desired shape, fold the corners and hold these secure by twisting wire through and snipping off the excess. The picture should make that easier to understand.


Queen cage, wire queen cage
Queen push in cage

Having removed the queen from the colony to be re-queened, or a nuc made up specifically to receive the new queen,  leave them for eight or nine days. There will then be no larvae with which the bees can make a queen from for themselves, remove any emergency queen cells that they have started.
The introduction can then be carried out.

The idea is that a comb from this colony to be is selected that has emerging brood and some stores, honey and pollen. The comb is shaken or brushed free of bees and the new queen placed the comb, under the cage such that the queen has free run of the area within the cage. The cage should cover some stores and emerging brood. The cage is then pushed firmly into the comb, right to the midrib. This frame is then returned to to hive and left for five days.
During this time the emerging brood will be trapped in the cage with the new queen. They will feed from the available stores and be fed through the cage by their sisters, as the new queen is the only one they have ever known they will feed the new queen also. She will thus take on the scent of the colony and come back into lay, using the cells vacated by the emerging brood. A queen that has been caged and posted for example will shrink in size and stop laying, the bees will not accept her as readily if she doesn't smell like a laying queen.

Inspection after five days should show the queen and by now many nurse bees in the cage, the workers outside if the cage should show no aggression to the queen below, not clinging the the frame or tightly clustering on it. The queen will have laid into the vacant cells and these should be visible.

The cage can now be gently removed, the queen and her attendants will wander off onto the wider comb quite happily and the comb returned and the hive quietly closed up.

This method I have found to be completely reliable, never having a queen rejected.

I will update this page later this year with some pictures and/or a video showing the process.